Monday, 10 November 2014

Rename Multiple Files at Once

To change the name of multiple files at once highlight all the files you want to rename in Windows Explorer and press the F2 key. Type in the new name you want to use for all files and press enter. Once done all files will be renamed to the name entered followed by a unique number.

1. Select all the file you want to rename
2. Right click and select rename or press F2 key
3. Rename the file
4. Done

    Enjoy...................

Sunday, 9 November 2014

Change Your Language-Tutorial

1.Go to Google Input Tool
2. Download for Pc
3. Select the language and click downlaod
4. Install the downlaod file
    after installation you can change the language by clicking the language bar in the bottom corner
Done
Enjoyyyyyy..............

Read this also Change Facebook Theme using Firefox-Tutorial

Download Torrent Files With IDM-Tutorial

1. Download the torrent file
2. Open a tab in your browser and go to www.zbigz.com
3. Click on the upload button and upload your torrent file

5. Click Go

6. Wait for Caching complete
7. Click on the download button

done

Mac to an Android Phone USB Tethering-Tutorial

1. Download the latest Horndis package
2. Install the package
3. Now plugin your android device and enable Usb tethering

4. Now on the Mac, open System Preferences -> Network. You should see your phone as one of the connections in the list. Like so:

Record the Screen on a Mac for Free-Tutorial

  1. Open Quicktime Player, it’s in the Applications folder. You may not see a Quicktime window, but you will see the Quicktime Player menu bar at the top.
  2. Click on File menu -> New Screen Recording.
    Now you will see the screen recording window.
  3. Click on the white down arrow to adjust desired settings. You can choose the source for audio, either your built-in microphone, or the in-line audio input. Here you can also select the video quality of the recording, higher quality will lead to larger files.
    The Slider below the red record button adjusts the microphone/input sensitivity.
  4. Click on the red record button. Now you have the option to record your full screen (default), or you may click to drag a specific area of your screen to crop. The excluded area will be dark.

    Recording a larger area will result in larger files.
  5. Once you selected the area, click to continue. You will now be recording your actions.
  6. When finished, click on the stop button, and the video you recorded will now pop up, and you can view it.
  7. Use the Share button (File menu-> Share) to quickly upload to: YouTube, Facebook, Video and others conveniently right from Quicktime.
    Or click on File menu -> Export to make a video file, to submit/share your video manually.

Change FaceBook Theme using Firefox - Tutorial

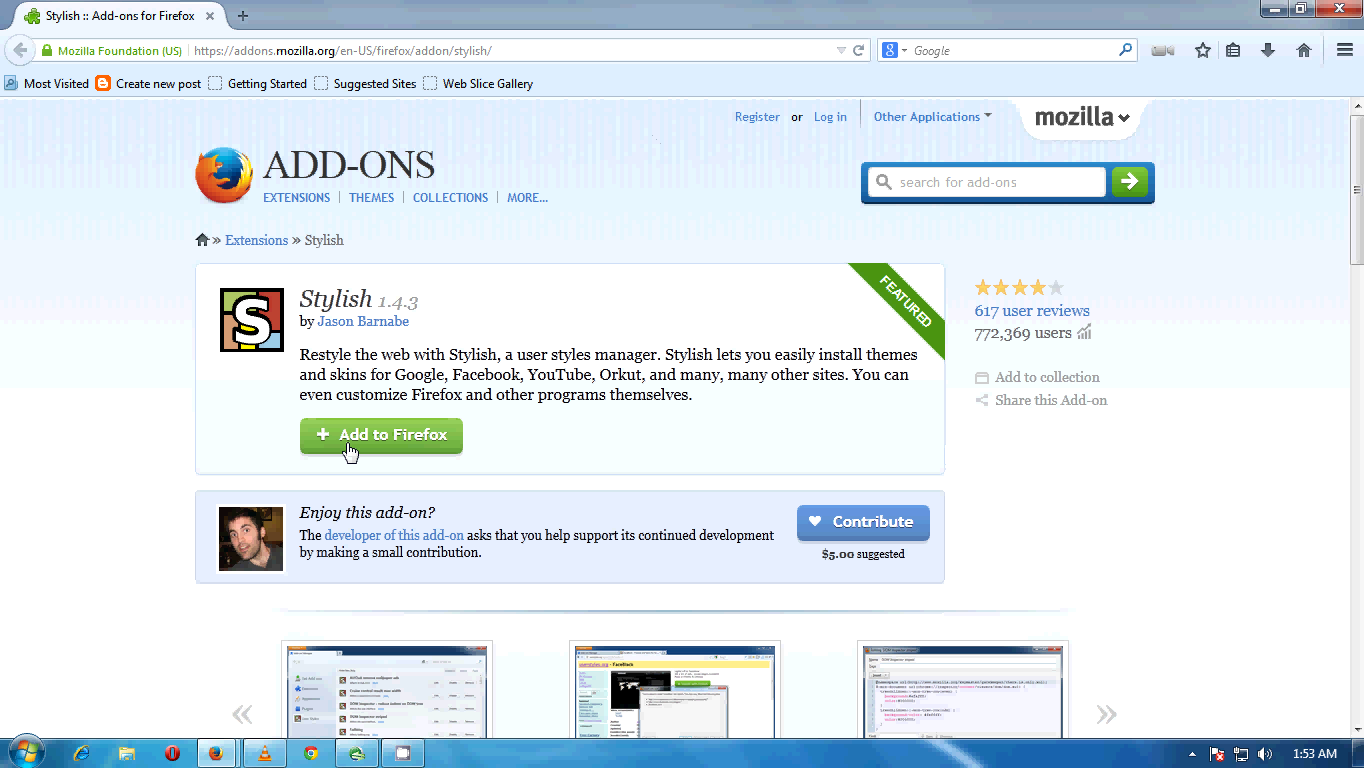
1. Open Firefox
2. Add STYLISH extension
3. Open your FaceBook account
4. Click on the symbol of "Stylish" at the top corner
5. Click Find styles for this site...
Then a new website will appear
6. Click on the themes as your like

7. Click Install with Stylish
Done.

Note: With these extension you can change themes of any sites including GOOGLE and YOUTUBE
Enjoyyyy............................

Compress Large file to Small File using KgB Archiver -Tutorial

1. Install Kgb Archiver
2. Open Kgb Archiver
3.Select the file you want to compress
4. Click on the archive button
5. After that a new window appear, select KgB and set it compression level to maximum
6. Click Next  and done
Then it start to compress your file into small size

See this 263.4 mb compress to 1.8 mb


Enjoy.....................

Saturday, 8 November 2014

How to Make a Bootable USB Drive

1. Install WinToFlash on your pc
2. Plugin  usb drive into your computer
3. Open WinToFlash
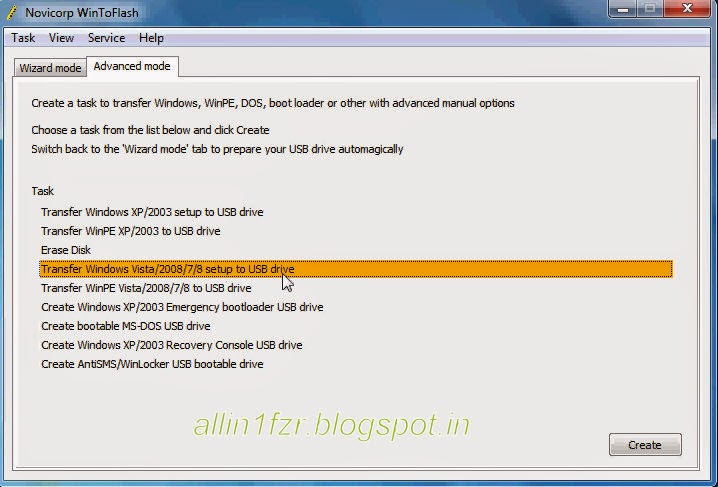
4. Click on advanced mode

5. Select windows Vista/2008/7/8 setup to usb drive


6. Select the windows path file and browse your windows .iso file

7. Next click run accept the terms , you will get a message where it says the drive will be formatted   click OK , again OK . The program will start copying the windows files.
 Done......

Any doubt comment below

Connect Internet Without PC Suite

1 . Click "Start" STEP 1 . Click "Control Panel"
2 . Double Click"Network Connection"
3 . Click "Create a new connection" in Network Tasks in left side.
4 . Click "Next"
5 . Select"Connect to the Internet" and Click"Next"
6 . Select "Set up my connection manually" and click"Next"
7 . Select"Connect using a dial- up modem" and click "Next"
8 . Select your modem here and click"Next"
9 . ISP name, keep it blank and click"Next"
10 . Type Phone Number *99# and click "Next"
11 . Keep user name and password blanks and click "Next"
12 . Select "Add a shortcut to this connection to my desktop" and click"Finish"
13 . Now click"Dial" to connect internet.
14 . Now you can successfully connect internet without PC Suite

Download Big Files With Opera Handler

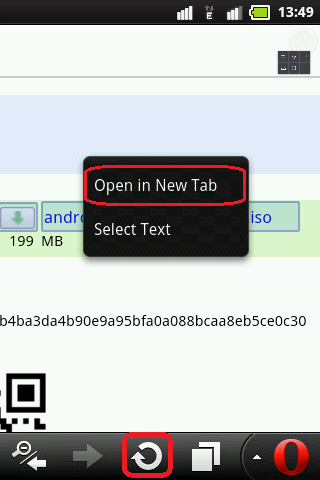
  1. First of all browse through the download page. Then tap and hold on the download link to open menu.
  2. Tap Open in New Tab. Now tap the Reload like screenshot given below.
Opera Mini BIG File Download Trick
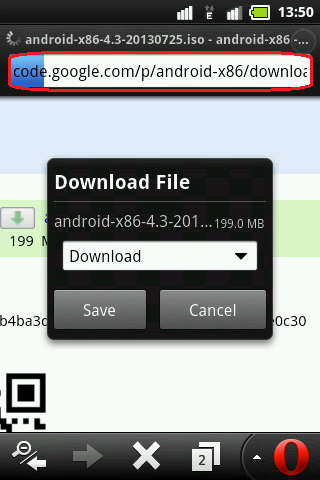
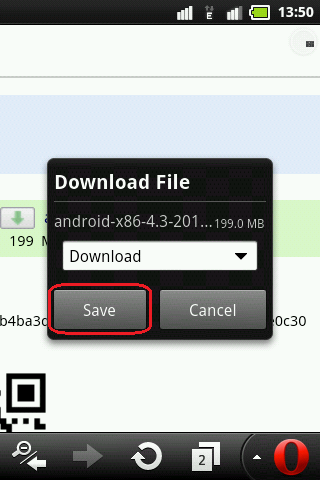
  1. The download page will start reloading. In the mean time opera will prompt you to save the file. Wait wait... Don't tap the save button before the reload gets completed (otherwise you will ruin the trick).
Opera Mini BIG File Download Trick
  1. After download page finish it's reloading just tap Save.
  2. That's it. Your download should be started soon.
Opera Mini Big File Download - Save
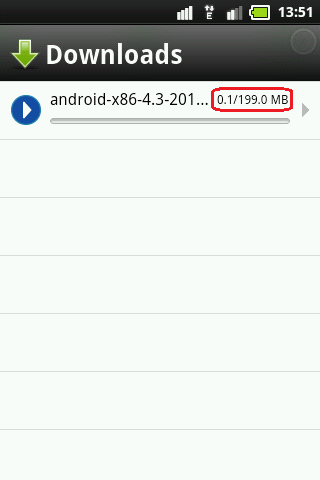
  1. Have a look at the below screenshot to make sure that Reload trick is a working trick.
Opera Mini BIG File Download Trick

Simple Tricks For Windows

  Display your Name with Time in Taskbar 
1.Click on your time in the taskbar and then click on the Change Date and time Setting .
2. It will open new a window, click on the Change Date and Time Setting .
3. Now click on the Change Calendar Setting .
4. In the customize Format window select Time Tab.
5. In this tab look for AM/PM symbol and give any name that you want to display along with Time
6. Click on OK button to save changes.


  Increase Your Net Speed In Win7
1. Go to run
2. type gpedit.msc
3. expand the administrative templates
4.  expand the network
5.  select Qos Packet Scheduler
6.  double click limit reservable bandwidth
7.  enable it and put 0 in the bandwidth limit
8.  click apply and ok

   Hide Your Disk Drive
1.open control panel
2.go to administrative tools
3.click computer management
4.now a window will appear
5.click disk management on the left column now u will see all disk drives suppose u have to hide local disk E right click on local disk E and choose change drive letter and paths now a small window will appear showing ur letter"E" click remove and then ok.....
open My computer u will not see local disk E to bring back repeat the above steps but when u open disk management the drive that is hidden will be without any letter

Open VPN Connect in Android-Tutorial


Openvpntech logo1


1. Open Menu and run application "Play Market".
2. Search and locate the application "OpenVPN Connect".
3. Download and Install the application.

4. Now get any working set of configuration from my blog or from any other site. But don't forget to take a working one.
5. Unzip the archive to any folder. You can use WinRar or ArchiDroid for this purpose.


    6. Run OpenVPN Connect.

    7. Press the "Menu".

    8. Select "Import".

    9. Select "Import Profile from SD card".

  10. Go to the directory with configuration files and select the desired connection.


  11. Enter your username and password specified during registration and press "Connect". Skip this  step if the text file containing the username and password is already present with config(in same location).


  12. Check the box "I trust this application" and click "OK".

  13. The client will report a successful connection. If the config is not working then it would not get   successfully connected.